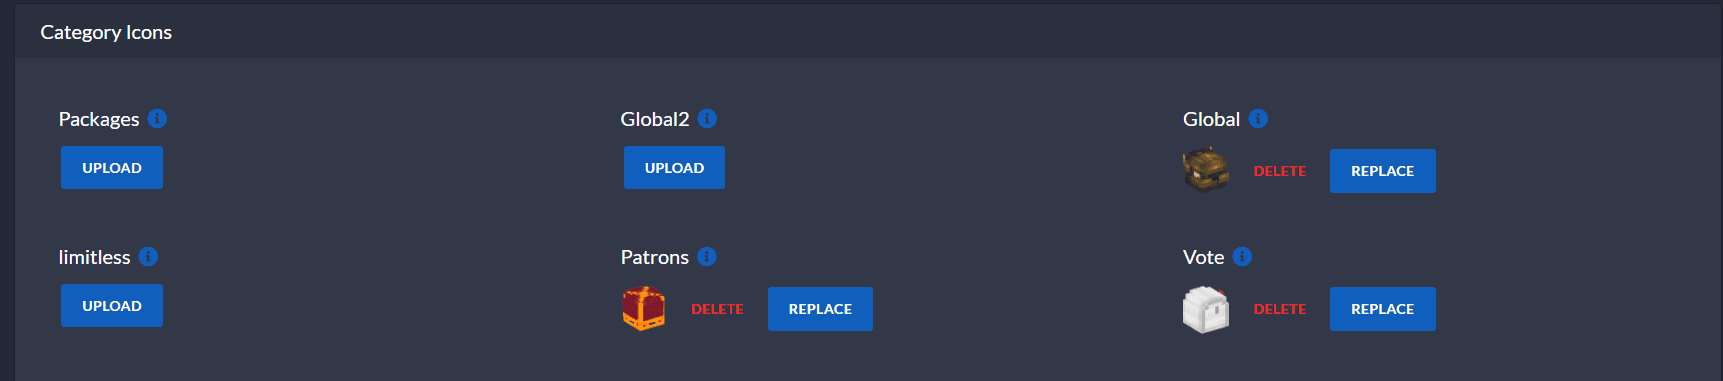
How to Change Category Icons
Follow this guide to learn how to switch out the icons for your categories.
⚠️
Remember to do this each time you add a new category.
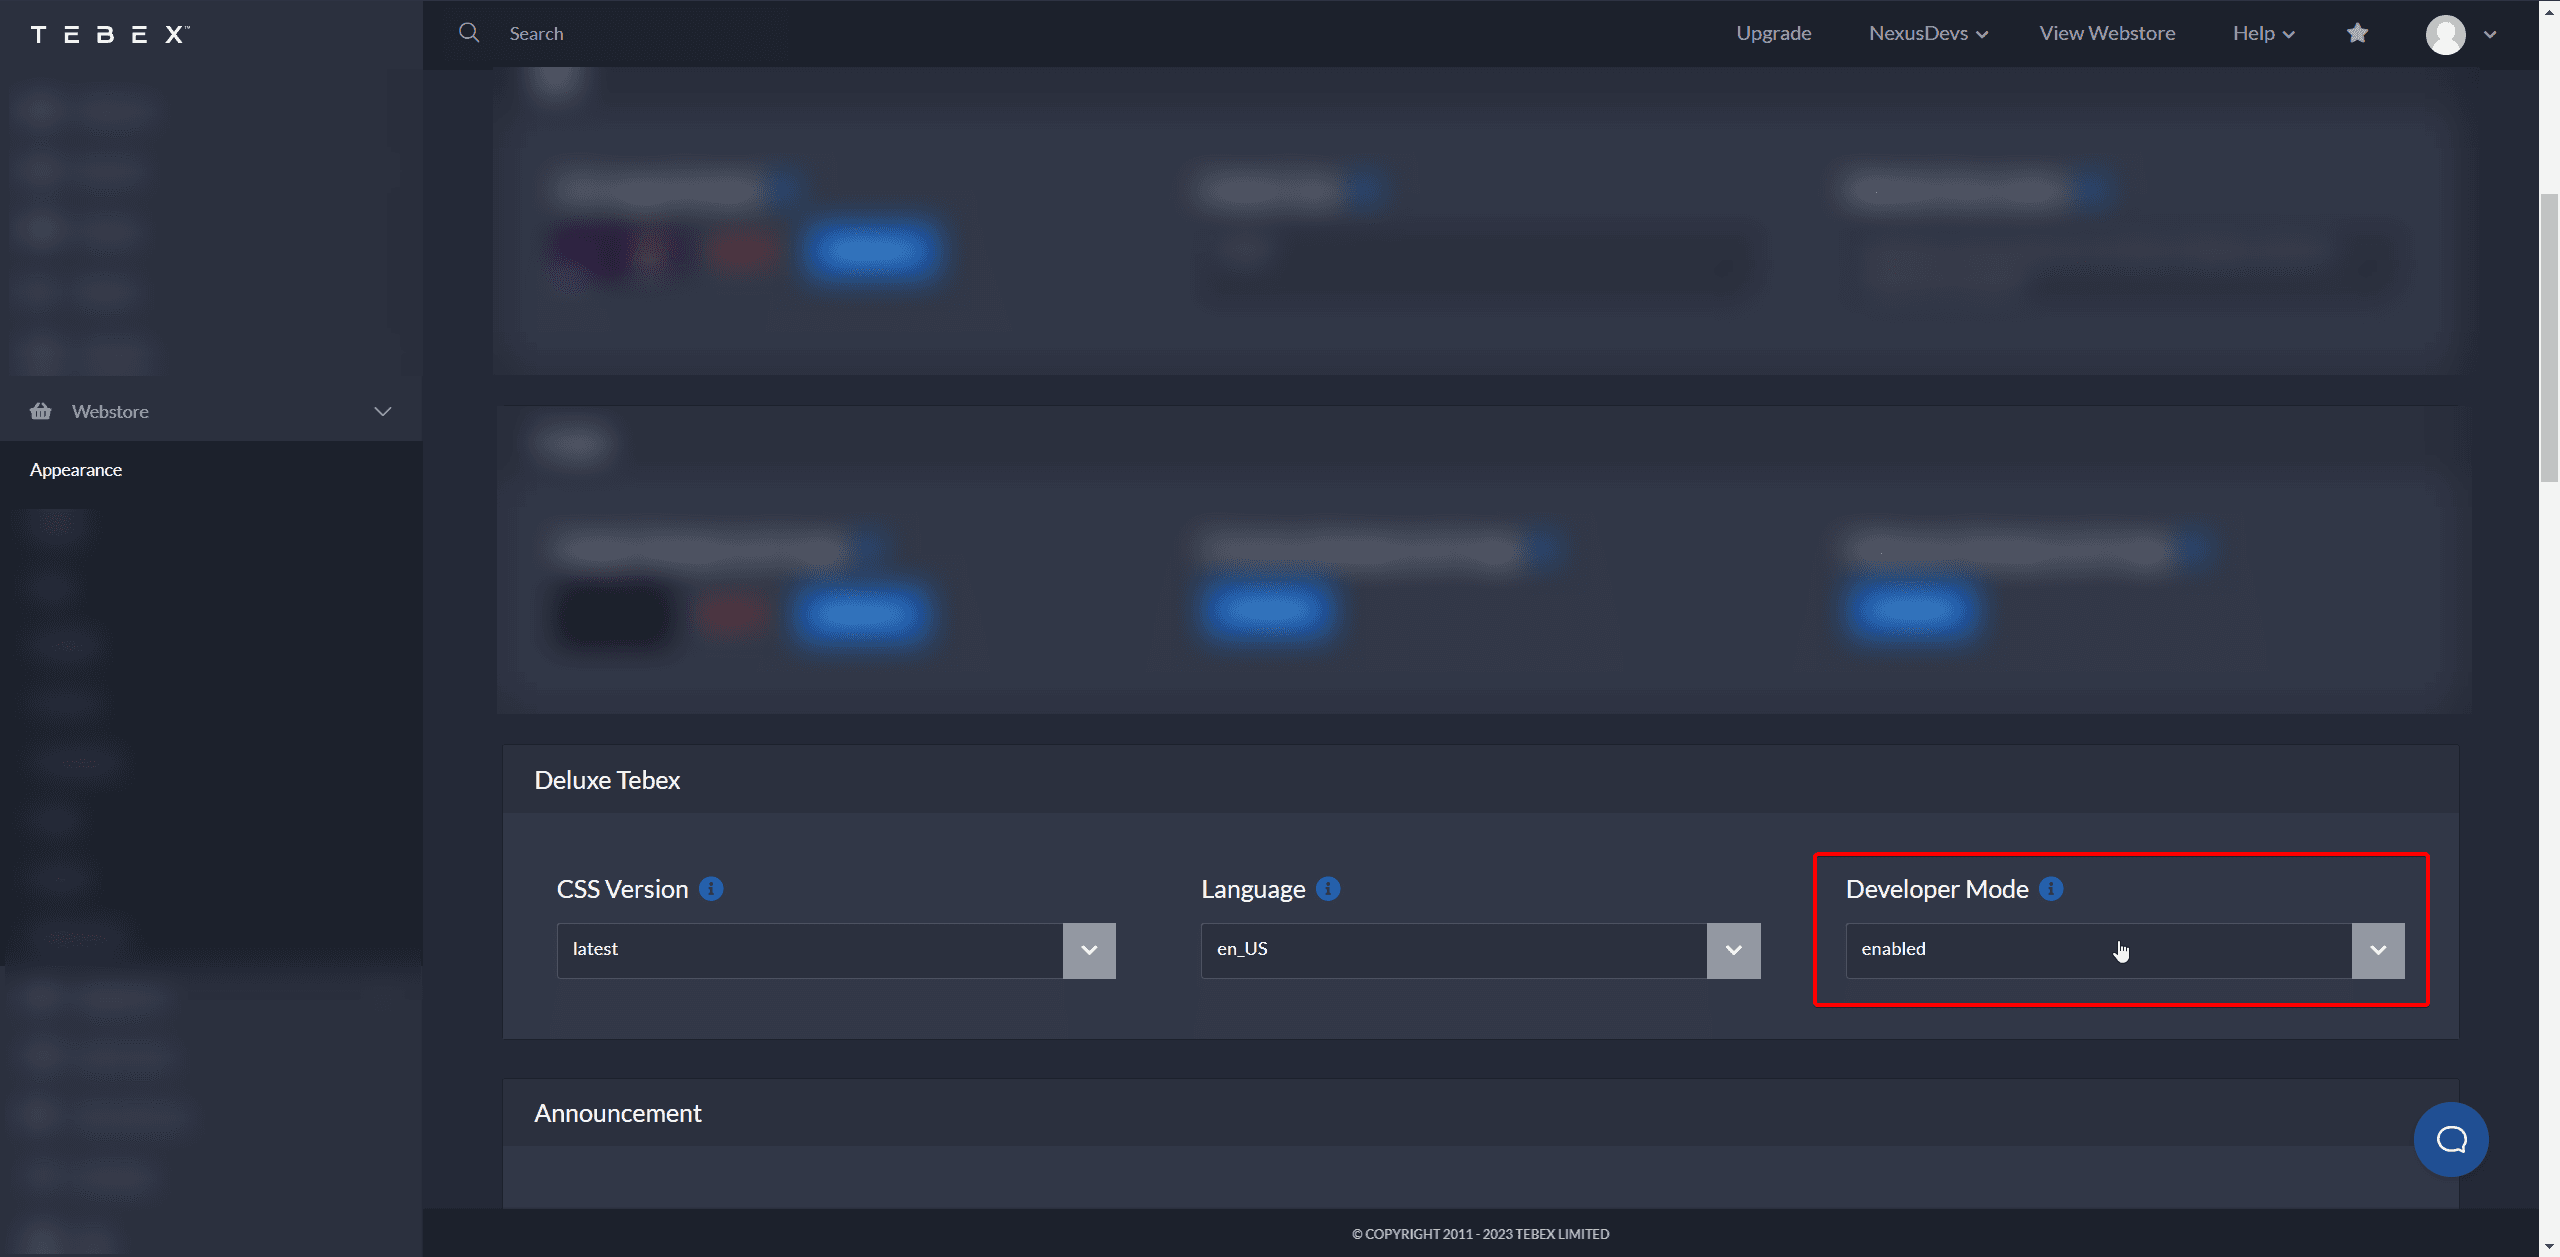
Turn on Developer Mode
Where to find it: Webstore > Appearance
Copy the New Code
After enabling the developer mode, you'll notice a new code at the top of your store page. Copy this code; you'll need it for the next step.

Go to Template Files and Open the Schema File
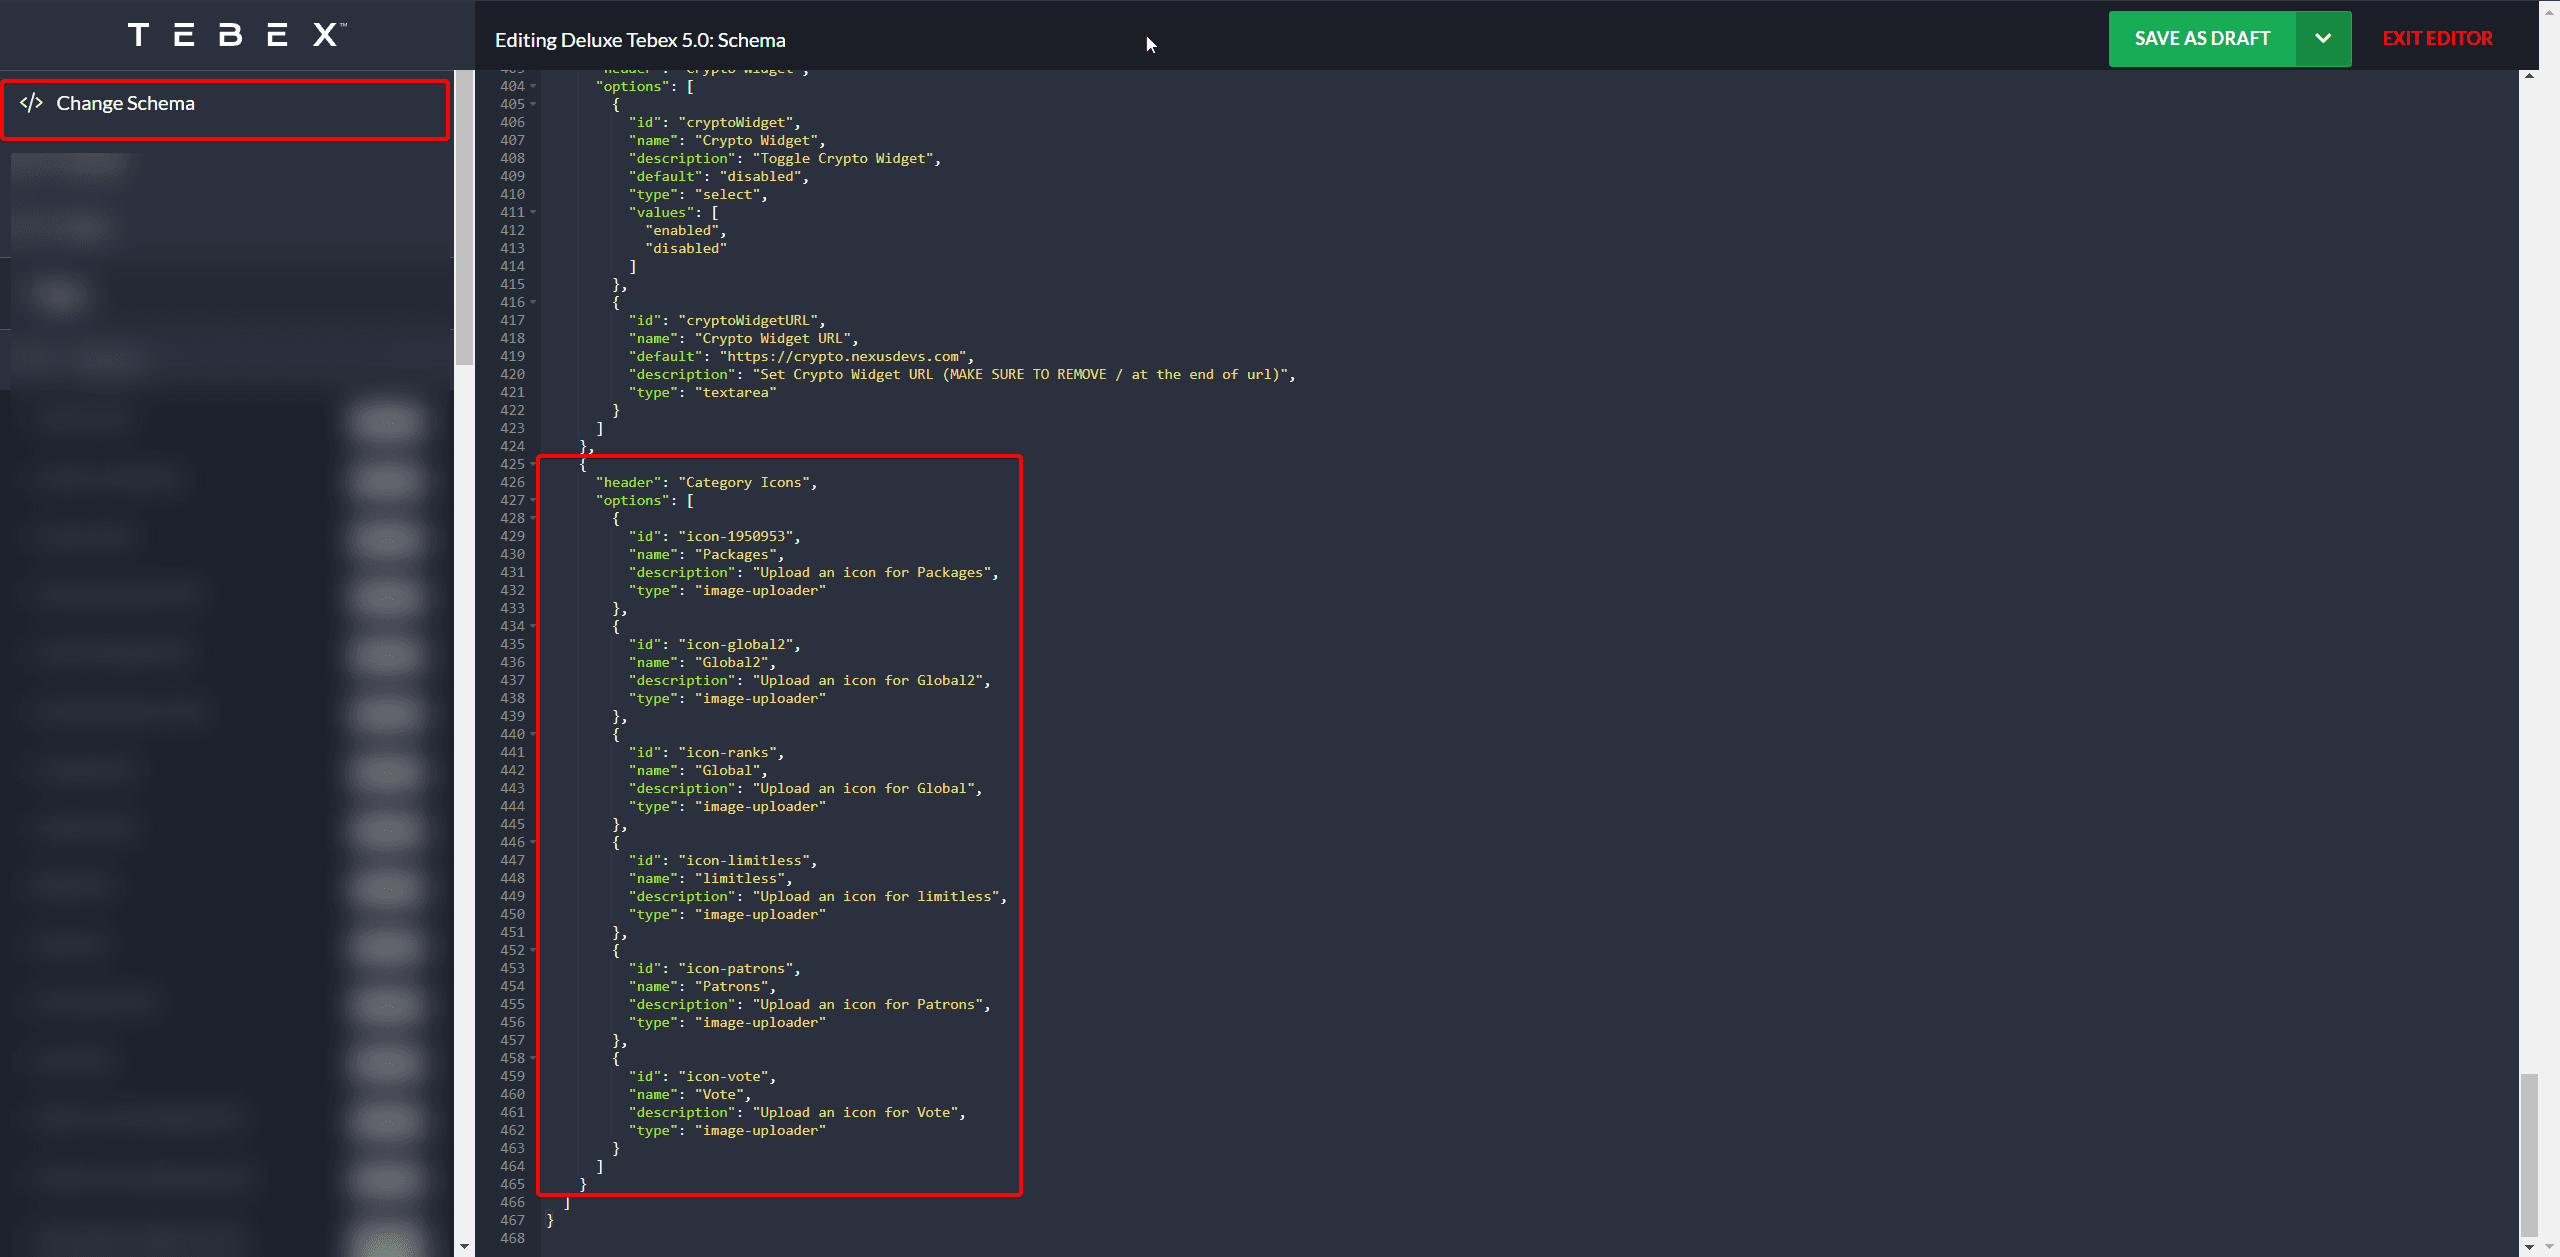
Find a code segment that resembles the one below and swap it with the code you copied in the previous step.
schema.json
{
    "header": "Category Icons",
    "options": [
        {
            "id": "icon-1950953",
            "name": "Packages",
            "description": "Upload an icon for Packages",
            "type": "image-uploader"
        },
        {
            "id": "icon-global2",
            "name": "Global2",
            "description": "Upload an icon for Global2",
            "type": "image-uploader"
        },
        {
            "id": "icon-ranks",
            "name": "Global",
            "description": "Upload an icon for Global",
            "type": "image-uploader"
        },
        {
            "id": "icon-limitless",
            "name": "limitless",
            "description": "Upload an icon for limitless",
            "type": "image-uploader"
        },
        {
            "id": "icon-patrons",
            "name": "Patrons",
            "description": "Upload an icon for Patrons",
            "type": "image-uploader"
        },
        {
            "id": "icon-vote",
            "name": "Vote",
            "description": "Upload an icon for Vote",
            "type": "image-uploader"
        }
    ]
}
Save and You're Done!
🚫
Make sure the file size of your icons is less than 2MB.
Click Save and Publish to finalize. You can now upload new icons for your categories.